

What’s an SSO ? #
Single sign-on (SSO) is an authentication scheme that allows a user to log in with a single ID to any of several related, yet independent, software systems.
A SSO allows you to authenticate once and have access to several applications. But in the context of a Homelab, what is the point ?
There are several advantages :
- Secure services to make them accessible from the outside
- Simplify the authentication process for access to multiple services
- Add double authentification
- Login regulation (Anti brute force)
Instalation #
Now that we have seen what an SSO is and the interest it can have in a Homelab, let’s start the installation!
In my case I chose to use Authelia, it’s an opensource SSO with interesting features like double authentication.
First of all, let’s start by installing and configuring the docker. For that you can follow the tuto available on Authelia’s website : Getting Started.
In my case I use Unraid and a template is directly available. I just have to set the port to use for the web interface.
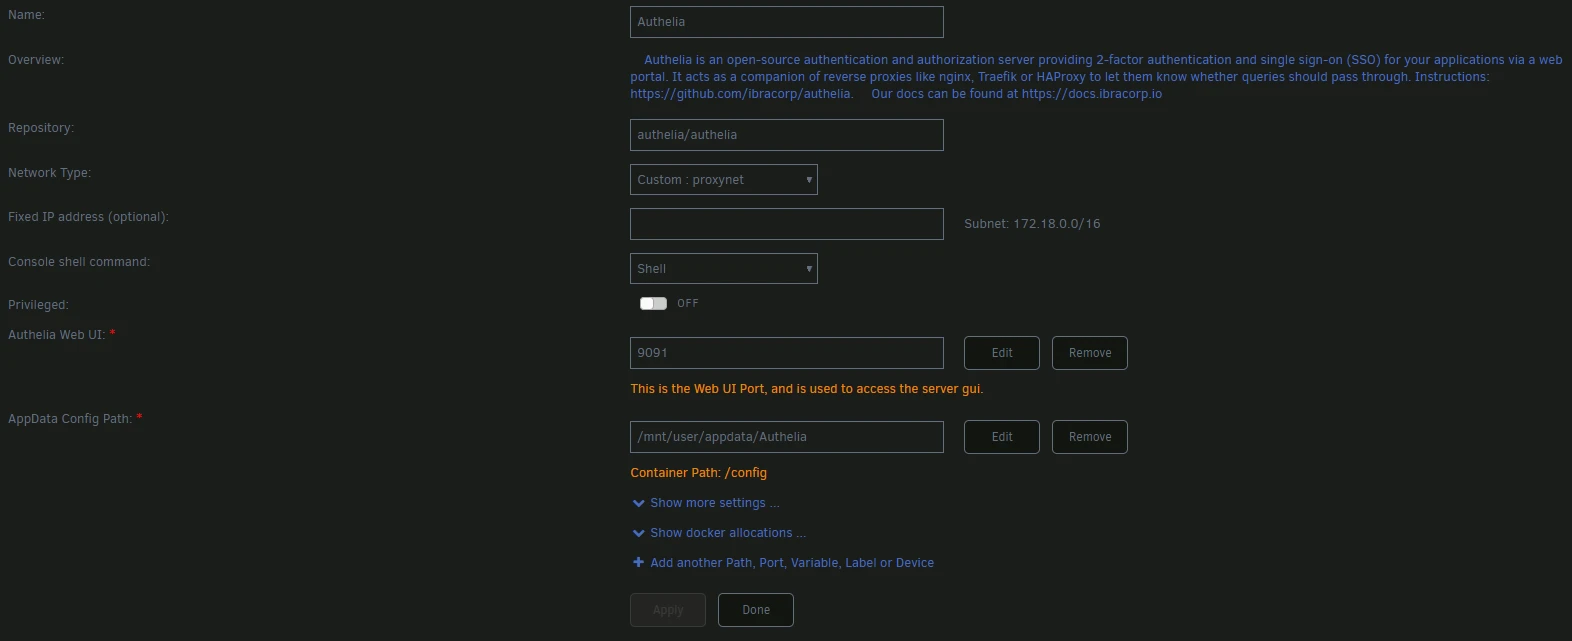
Before launching the docker we will have to make several changes to the configuration file.
Before starting you must have the following elements:
- A subdomain for the authentication portal (ex. auth.youdomain.com)
- A Redis docker
- A Mysql database (mariaDB, …)
- A reverse proxy (Nginx Proxy Manager, Traefik, …)
- [Optional] - SNMP credencial for mail notifications
- [Optional] - Duo account for push authentication
Now that all is ready we can move to the configuration of Authelia!
Configuration #
You can start by downloading my Configuration Template. This will allow you to follow the rest of the guide more easily and save time.Configuration Template
Let’s start by generating the secret JWT. For that I use this site.
jwt_secret: [example_secret]Session #
Several elements must be configured in this part:
- secret : generate a password with the site of your choice
- domain : indicate your domain (
ex. youdomain.com) - redis : indicate the ip, the port and the password of your Redis docker
session:
  name: authelia_session
  secret: [example_secret]
  expiration: 4h
  inactivity: 30m
  remember_me_duration: 12h
  domain: example.org

  redis:
  host: [redis_ip]
    port: [redis_port]
    password: [redis_password]
    database_index: 0
    maximum_active_connections: 8
    minimum_idle_connections: 0
User #
It is in this part that you will have to add the users who will be able to connect to the SSO. No element has to be modified in the configuration file, but you will have to create a second file: users_database.yml. This file is composed as follows:
users:
user1:
password:
displayname: User1
email: User1s@gmail.com
groups:
- user
user2:
password:
displayname: User2
email: User2s@gmail.com
groups:
- user
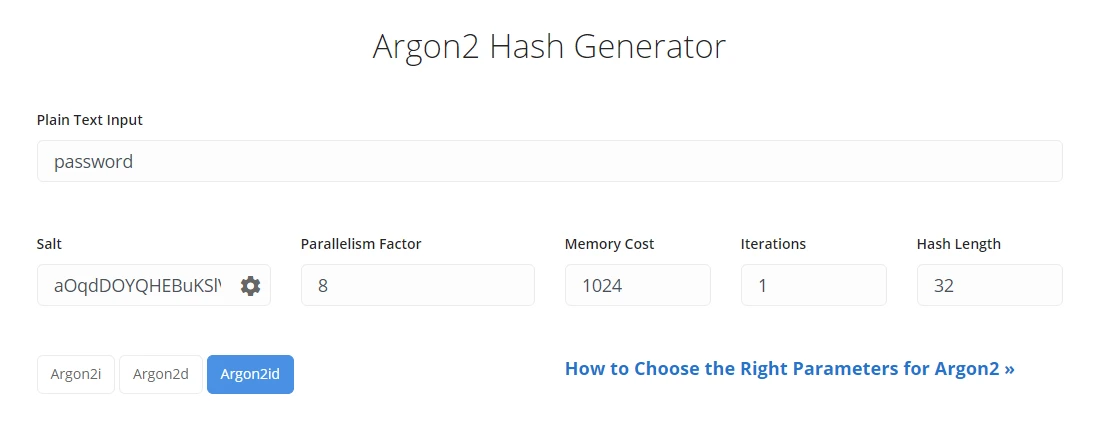
[...]To create the user password hash you can use the following command:
docker run --rm authelia/authelia:latest authelia hash-password 'yourpassword'If this does not work you can manually create the hash using this site and these parameters:
Access control #
For the access policy we will do something simple with a single role. But nothing prevents you from creating several roles with different rights and access.
So we are going to create a user group that will have to use the double authentication and will have access to all the subdomains. For this you have to modify the two exemple.org in the template file.
access_control:
  default_policy: deny
  rules:
    - domain:
      - [example.org]
      - "[*.example.org]"
      subject: "group:user"
      policy: two_factor
Storage #
For the storage part we will use our database created with Mysql. You have to modify the following values in the template:
- encryption_key : generate a password with the site of your choice
- mysql : indicate ip, port, database name, user and mysql password
storage:
  encryption_key: [example_secret]
  mysql:
    host: [mysql_ip]
    port: [mysql_port]
    database: [mysql_database_name]
    username: [mysql_user]
    password: [mysql_password]
Regulation #
For the anti brute force security, we will set up a regulation policy with 3 attempts maximum in 2 min before a ban of 5 min. This regulation is not the ultimate solution, it is always preferable to also set up a Fail2ban to complete this solution.
regulation:
  max_retries: 3
  find_time: 2m
  ban_time: 5m
Notification #
To set up email notifications, you must fill in the following part of the template. This part is not mandatory but it is used to reset your password in case you forget…
smtp:
  username: [example@example.org]
  password: [smtp_password]
  host: [smtp_host]
  port: [smtp_port]
  sender: [example@example.org]
  identifier: localhost
  subject: "[Authelia] {title}"
  startup_check_address: test@authelia.com
  disable_require_tls: true
  disable_html_emails: false
Double Authentification #
For the double authentication several solutions are offered to you. The two most interesting celons me are the following:
TOTP
This is the most famous method, you just have to use an application like Google Auth to get a code that changes every 30 seconds. The configuration is very simple, just customize the issuer field with the name you want. This name will be displayed in your
TOTP #
application.totp:
  issuer: [example.example.org]
  period: 30
  skew: 1
Duo Push Notification #
This is the most practical method, when you connect to your SSO, you will receive a notification that will allow you to validate your access. The configuration requires 3 elements that we will create directly on the Duo website. In the Applications tab, click on Protect an Application and look for Partner Auth API. You can now retrieve the following elements and enter them in the Authelia configuration:
- Integration key
- Secret Key
- API hostname
duo_api:
  hostname: [duo_hostname]
  integration_key: [duo_integration_key]
  secret_key: [duo_secret_key]
You can now start the Authelia docker, if all goes well there should be no errors. If this is the case you can go on, if not you can correct the problems until there are no more. To solve the problems you can use the Authelia documentation, but also their github.
Integration with a reverse proxy #
First of all we will have to set up our Authelia subdomain so that it is accessible from the outside, but also protected with certificates. To do this, create an entry in your reverse proxy and add your subdomain, see:

How to host multiple services on one public IP ?
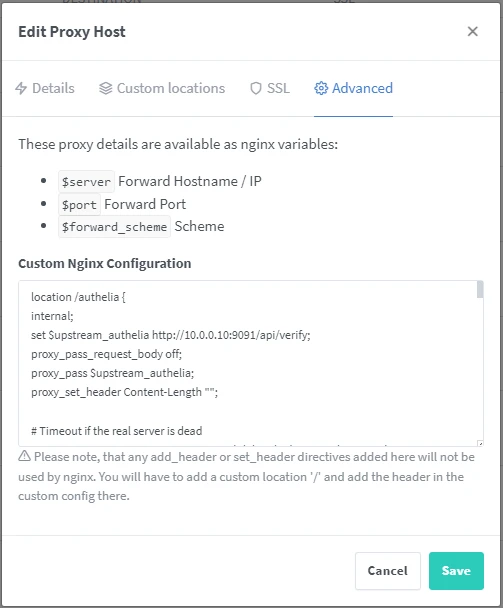
Now that this is done, we can add our SSO to the different subdomain we want to protect. To do this you just need to change the [authelia_IP] in the following code:
location /authelia {
internal;
set $upstream_authelia http://[authelia_IP]:9091/api/verify;
proxy_pass_request_body off;
proxy_pass $upstream_authelia;
proxy_set_header Content-Length "";

# Timeout if the real server is dead
proxy_next_upstream error timeout invalid_header http_500 http_502 http_503;
client_body_buffer_size 128k;
proxy_set_header Host $host;
proxy_set_header X-Original-URL $scheme://$http_host$request_uri;
proxy_set_header X-Real-IP $remote_addr;
proxy_set_header X-Forwarded-For $remote_addr;
proxy_set_header X-Forwarded-Proto $scheme;
proxy_set_header X-Forwarded-Host $http_host;
proxy_set_header X-Forwarded-Uri $request_uri;
proxy_set_header X-Forwarded-Ssl on;
proxy_redirect  http://  $scheme://;
proxy_http_version 1.1;
proxy_set_header Connection "";
proxy_cache_bypass $cookie_session;
proxy_no_cache $cookie_session;
proxy_buffers 4 32k;

send_timeout 5m;
proxy_read_timeout 240;
proxy_send_timeout 240;
proxy_connect_timeout 240;
}

location / {
set $upstream_app $forward_scheme://$server:$port;
proxy_pass $upstream_app;

auth_request /authelia;
auth_request_set $target_url https://$http_host$request_uri;
auth_request_set $user $upstream_http_remote_user;
auth_request_set $email $upstream_http_remote_email;
auth_request_set $groups $upstream_http_remote_groups;
proxy_set_header Remote-User $user;
proxy_set_header Remote-Email $email;
proxy_set_header Remote-Groups $groups;

error_page 401 =302 https://[auth_domain]/?rd=$target_url;

client_body_buffer_size 128k;

proxy_next_upstream error timeout invalid_header http_500 http_502 http_503;

send_timeout 5m;
proxy_read_timeout 360;
proxy_send_timeout 360;
proxy_connect_timeout 360;

proxy_set_header Host $host;
proxy_set_header Upgrade $http_upgrade;
proxy_set_header Connection $http_connection;
proxy_set_header Accept-Encoding gzip;
proxy_set_header X-Real-IP $remote_addr;
proxy_set_header X-Forwarded-For $proxy_add_x_forwarded_for;
proxy_set_header X-Forwarded-Proto $scheme;
proxy_set_header X-Forwarded-Host $http_host;
proxy_set_header X-Forwarded-Uri $request_uri;
proxy_set_header X-Forwarded-Ssl on;
proxy_redirect  http://  $scheme://;
proxy_http_version 1.1;
proxy_set_header Connection "";
proxy_cache_bypass $cookie_session;
proxy_no_cache $cookie_session;
proxy_buffers 64 256k;

set_real_ip_from 172.18.0.0/16;
set_real_ip_from 172.19.0.0/16;
real_ip_header CF-Connecting-IP;
real_ip_recursive on;

}
Then you can add it in the Advanced tab of the desired subdomain:
After saving, go to the address of your subdomain to verify that it works. You should arrive on the following page:
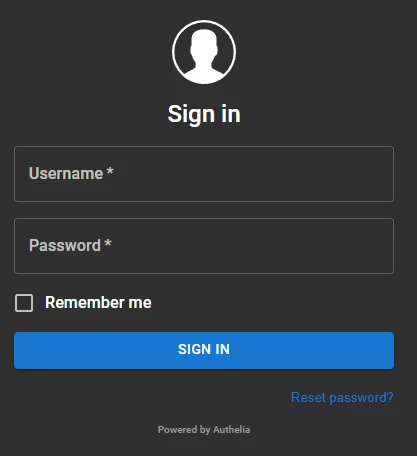
You can connect with one of the credencials you created in the users_database.yml file. Once the connection is done, you should be redirected to the application hosted on the subdomain!
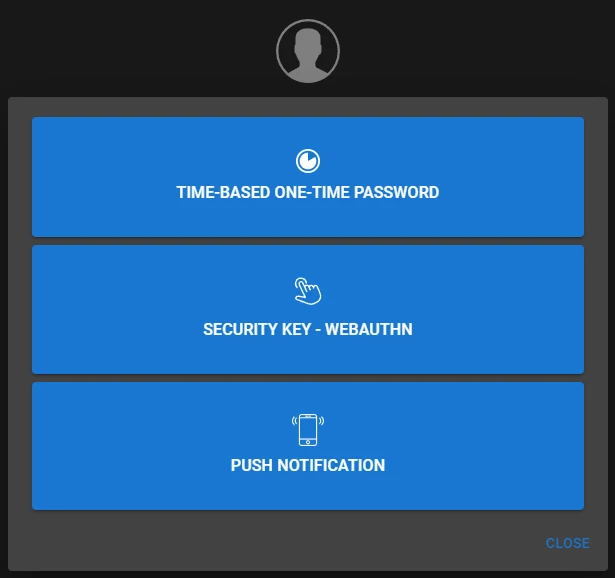
To configure/modify the double authentication method, go to the subdomain you have configured for Authelia (ex. auth.youdomain.com). Then select Methods:
Conclusion #
You now have SSO with dual authentication. This is particularly useful if you want to use the same account on several applications, add authentication to certain applications, or manage access rights to applications.